

If you have a website, you must include some security checks in the contact forms or wherever you expect any user input. If you don’t do so, you would face unnecessary spam messages or emails. In older days, webmasters use some simple calculations like additions and verify the answers given by the user. This is to verify if the user is a human or a bot.
Google reCAPTCHA is a verification system owned and made by Google. It’s is a captcha system intended to distinguish between humans and automated bots accessing a website. There have been many versions of the system. The older version used to ask a user to write the same text which appears in a harder-looking image.
Google reCAPTCHA is an advanced way to verify authentic users. The users just need to tick a checkbox that says “I am not a robot” or need to complete a simple challenge (depending upon the type of the captcha).

In this article, we shall see how we can integrate google reCAPTCHA on a website step by step.
Step 1 – Get the API keys.
Google reCAPTCHA is a third-party service, and hence you need some API keys to work with it.
The first thing you need to do is to register your website on https://www.google.com/recaptcha/admin.
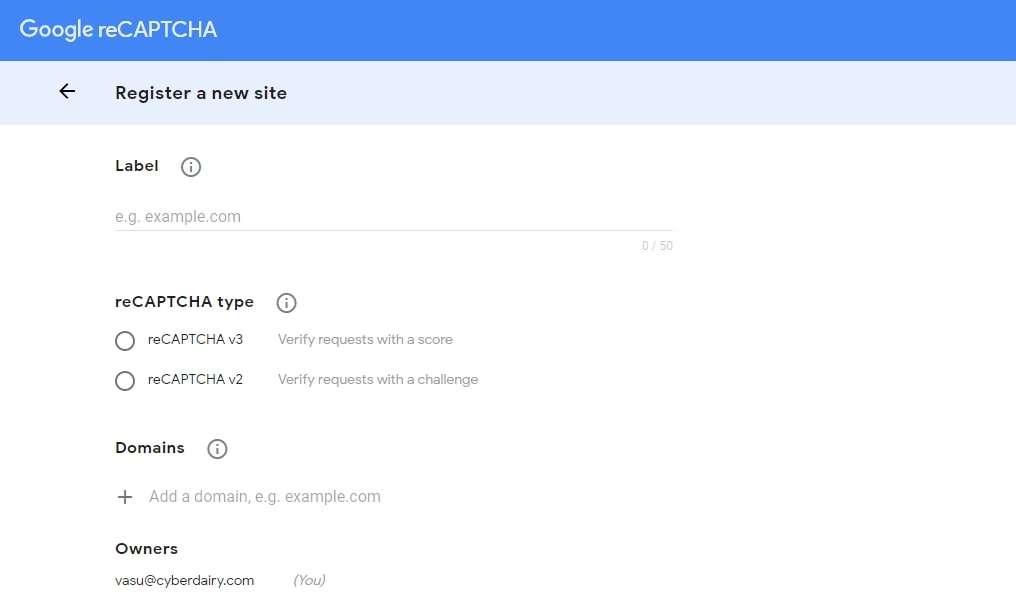
Go to the above URL, and then click on the ‘+’ symbol to register a new website.
A new page would be opened where you need to register your site. Here you can choose the type of captcha (I would recommend reCAPTCHA v2).
After accepting the terms and conditions, hit the register button. After successful registration, you will get your API keys. There would be two API keys, a site key, and a secret key.
Step 2 – Integrating reCAPTCHA to your website
You will need to add the reCAPTCHA JavaScript library to your webpage.
Add this JavaScript in the footer section of your webpage or header section (It is up to you, but I would suggest placing it in the footer section).
<script src=’https://www.google.com/recaptcha/api.js’ async defer ></script>
And add this HTML to your page, wherever you want the captcha to appear.
<div class=”g-recaptcha” data-sitekey=”your site key”></div>
Note: In the above div, replace site_key with the site key provided by google recaptcha.
After doing all this, reload your page and you would get the captcha on your page.
Step 3 – Validating the response given by the user
When the user clicks on the captcha widget, a captcha response will be generated which we need to verify at the backend. To verify the reCAPTCHA response we need to add the below PHP code into a PHP file.
Whenever the user clicks or ticks the integrated captcha, a response would be generated which is verified at the backend. The following PHP script along with some HTML shows how a captcha response is generated and verified.
In the below code, the HTML section depicts a simple contact form containing some input fields for taking username, email, user phone, and message.
The PHP script is used to submit the form and verifying the user response to the captcha.
<?php
$sitekey = 'Put your site key here';

if(isset($_POST['submit']))
{
        if(isset($_POST['g-recaptcha-response']) &&
        !empty($_POST['g-recaptcha-response']))
        {
                $secret = 'Put your secret key here';
                $verifyResponse = file_get_contents('https://www.google.com/recaptcha/api/siteverify?secret='.$secret.'&response='.$_POST['g-recaptcha-response']);
                $responseData = json_decode($verifyResponse);
                if($responseData->success)
                {
                        $name = $_POST['username'];
                        $email = $_POST['usermail'];
                        $phone = $_POST['userphone'];
                        $message = $_POST['message'];
                }
        }
}
?>

<!doctype html>
<html>
<head>
</head>
<body>
        <div class="form_container">
                <form action="" method="post">
                        <div class="inputbox">
                                <input type ="text" name = "username" placeholder="Enter your name">
                        </div>
                        <div class="inputbox">
                                <input type ="email" name = "usermail" placeholder="Enter your email">
                        </div>
                        <div class="inputbox">
                                <input type ="phone" name = "userphone" placeholder="Enter your phone number">
                        </div>
                        <div class="inputbox">
                                <textarea name = "message" placeholder="Type your message here"></textarea>
                        </div>
                        <div class="g-recaptcha" data-sitekey="<?php echo $sitekey?>"></div>
                        <div class="btn">
                                <button type="submit">Submit</button>
                        </div>
                </form>
        </div>

        <script src='https://www.google.com/recaptcha/api.js' async defer ></script>
</body>
</html>
When the form is submitted, a new HTML element ‘g-recaptcha-response’ will be created dynamically and it will store the user’s response token. This token will then be posted to the PHP code while submitting the contact form.
After submitting the form, the captcha response given by the user is verified. On successful verification, the username, email, phone, and message would be stored in the variables $name, $email, $phone, and $message respectively. Now you can store this user info in the database or wherever required.